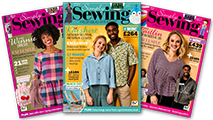



Get the new Great British Sewing Bee book worth £30 when you subscribe to Simply Sewing magazine
When they finally appeared, many people thought they were unnecessary, impractical and even scandalous

Isn’t this cute? Jo Carter’s adorable cat sewing pattern is full of character! You could stitch this charming kitty for yourself or as a special gift for a child. We love spending time sewing soft toys, especially one’s that are free sewing patterns! There’s something about the process that’s deeply satisfying and you’ll get a real sense of achievement when you finish the toy.
It’s made using luxuriously soft plush fabric – perfect for cuddling. This project has some fiddly sections, so it’s best suited to intermediate or advanced sewers, but the finished toy is well worth spending time on. If you’re making it as a gift for a cat lover, you could customise it to look just like their cat and make a gift that will really be treasured.
This project was first featured in Simply Sewing Magazine. Simply Sewing is an informative magazine for sewers of all abilities and its packed with expert tips, plus beautiful patterns to sew. Jo Carter is a professional toy designer who regularly contributes to Simply Sewing Magazine.
If you’re new to sewing, you might find it helpful to take a look at some of our beginner’s guides before you attempt a project like this one. Take a look at our sewing for beginners, how to use a sewing machine, sewing kits for beginners and best sewing machines for beginners guides before you get started.
All fabrics from www.plushaddict.co.uk
Trace and cut out all the template pieces. The templates include seam allowances where necessary and the arrows indicate the print direction for marking and cutting out. The notches are used to match pieces when stitching together, so mark these too. When the pattern specifies to cut two or more of a template, after marking out half of the pieces required, the template needs to be turned over to mark out the remaining half so that the pieces are cut as mirror images.
Using a water erasable pen or pencil draw out the pattern pieces onto the wrong side (WS) of the fabric and cut out the following:
From the main fabric:
From the contrast fabric:
From the pink cotton fabric:
With right sides (RS) together, sew the top of the nose together across the bottom of the top snout.

With RS together, sew the curved side of the side snout around the internal curve in the corresponding side face piece.
Repeat this for the other side.

With RS together, sew one side of the joined nose and top snout to the joined side snout and face.

Repeat for the other side and then bring the side faces together and sew together above the top snout.
Sew the lower face together from the bottom of the nose down to the neck edge.
Place one main ear piece and one contrast ear piece RS together and sew around the sides, leaving the bottom edge open.
Clip the seam allowance at the tip and turn RS out.
Fold one side in so that the bottom of the ear forms a straight line and the inner ear fabric is together and tack the fold in place.
Repeat this to make the other ear. This fold will be in the opposite direction this time so that it is a mirror image to the first.

With the contrast inner ears facing the RS of the face and the fold at the top, pin and then tack the ears in place between the markers on each side.

Make the smallest holes possible through which to allow the shank of the eye in the side face pieces where marked. Fit the eyes in place according to manufacturer’s instructions.
Place the back head pieces RS facing and sew together from the top down along the back of the head for approximately 5cm (2in) just to join them.

With RS together, line up the seam at the top of the face with the central seam in the back head and from this top point sew the front and back head together down one side. Return to the top point and sew the remaining side together. Sewing the seam in two parts in this way is easier and helps to ensure a more even finish.

With RS together, sew the top of a hand piece across the bottom of an arm piece.
Fold this joined piece in half lengthways then sew down the side of the arm and around the hand. Taper the end of the seam for a neater, smoother finish.
Turn RS out and then repeat to make the other arm in the same way.

With RS together, sew the top of a top foot piece across the bottom of a leg piece.
Sew a bottom foot around the bottom of the top foot piece, taking care to make sure that the markers line up.
Sew the back of the leg together, leaving only the top open.
Turn RS out and then repeat to make the other leg.

Stuff each of the arms and legs, leaving the top 2cm (¾in) empty. Tack the tops of the arms closed to hold the filling in place.
Bring the top of one leg together so that the seam in the back meets the top centre of the leg and then tack the end closed.
Repeat this to stuff the other leg.

As the arms, legs and tail are sewn directly into the seams it is advisable to sew over the joins to make sure they are well secured and reduce the likelihood of them being pulled out. Place the tummy pieces RS facing and sew together along the front edge.

Tack the arms in place with the seam-side down, placing them on the RS of the tummy pieces.

With RS together, sew a back body piece to the corresponding side of the tummy along the side edge, sandwiching the arm properly in place. Repeat for the other side.
With the front of the legs against the RS of the tummy, tack the legs in place.

With RS together, sew the front of the base across the bottom of the tummy pieces fixing the legs in place. Sew the base to the back body on either side. Sewing the base on in three parts like this is easier than using one continuous seam.

Sew the head to the body, placing them RS together.

Fold the tail piece in half lengthways RS together and sew together, leaving the top end open. Turn RS out.
Fit the end of the tail, seam side down, in the back of the cat and with RS together sew the bottom back body together from the base to just above the tail.
Return to the short seam joining the back head pieces and close the rest of the back of the head as far the neck seam to leave an opening of 10cm (4in) in the back of the cat.

Turn the cat RS out and stuff.
Embroider a mouth and some whiskers on the snout using black stranded cotton.
Sew some shaping though the snout to give a cheek by bringing the needle out under one eye, securing the thread with a few small stitches and then taking the needle down through the snout. Don’t make the shaping stitches too small as they may pull and damage the fabric.

Take the needle back up to the eye and then back down again through the snout. Pull lightly on the thread to bring the eye down a little and make the snout a little more rounded, giving the face a little more character.
Secure the thread, take the needle back into the head and out again at any point and then snip away the excess.
Repeat this on the other side.
Using the black stranded cotton, bring the needle through the bottom of the foot where the base of one side toe and the middle toe would meet, directly up and through the top of the foot.
Make a few stitches through the foot to secure the thread in place. Bring the thread over to the front of the foot and back through the bottom of the foot.
Pull on the thread to tighten it, secure the toe stitches by taking the needle through the foot as at the start and then take the thread through the foot over to make the second toe stitch. Secure the thread and then snip away the excess to neaten.
Repeat to make the toe stitches on the other foot. Make fingerstitches on each hand in the same way.

Adjust any filling that has been disturbed and then sew the back of the body closed using ladder stitch or similar.
Find your next must-make project in our list of 20 toy sewing patterns for babies and children.


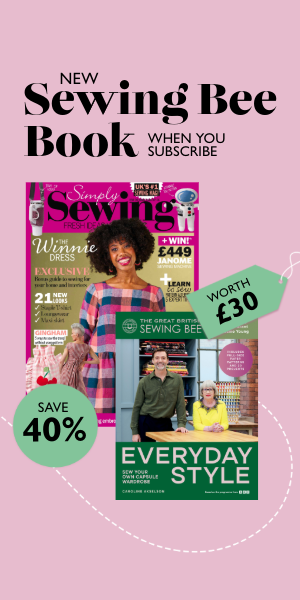
Never miss an issue! Sign up to receive your favourite magazine every month – delivered straight to your door.
Sign up today