


Close Menu
  • News
    • Fashion
    • Features
    • Sewing Bee & TV
    • Trends
    • Sustainability
    • Homes & gardens
    • Lifestyle
    • Wellbeing
  • Magazine
    • Meet the team
    • About Simply Sewing magazine
    • Latest issue
  • Sewing patterns
    • Free beginner sewing patterns
    • Free children’s sewing patterns
    • Free Christmas sewing patterns
    • Free home sewing patterns
    • Free sewing patterns
    • Free women’s sewing patterns
    • Pattern corrections
  • Sewing guides
    • How to sew
    • Sewing tools and kit
    • Reviews
  • Embroidery
    • Beginner embroidery patterns
    • Free embroidery patterns
    • How to embroider
    • Embroidery kit
  • Competitions
  • Pattern shop
  • Subscribe
  • Newsletters
Facebook Instagram Pinterest TikTok
  • FAQ
  • Meet the team
  • Advertise
  • Newsletters
Facebook Instagram Pinterest TikTok
Simply SewingSimply Sewing
Visit our pattern shop
  • News
    • Trends
    • Lifestyle
    • Features
    • Sewing Bee & TV
    • Fashion
    • Homes & gardens
    • Sustainability
    • Wellbeing
  • Buy magazine
    • Latest issues
    • Back issues
    • About Simply Sewing magazine
    • Meet the team
    • FAQ
    • Simply Sewing templates
  • Sewing guides
    • How to sew
    • Sewing tools and kit
    • Reviews
    • Pattern shop
  • Sewing patterns
    • Free sewing patterns
    • Free beginner sewing patterns
    • Free children’s sewing patterns
    • Free home sewing patterns
    • Free Christmas sewing patterns
    • Free women’s sewing patterns
    • Pattern shop
    • Pattern corrections
  • Embroidery
    • Beginner embroidery patterns
    • Free embroidery patterns
    • How to embroider
  • Win
Pattern shop Subscribe
Simply SewingSimply Sewing
Home»Sewing patterns»Free home sewing patterns»DIY knitting project bags

DIY knitting project bags

  • December 9, 2025
  • Ami Lowden

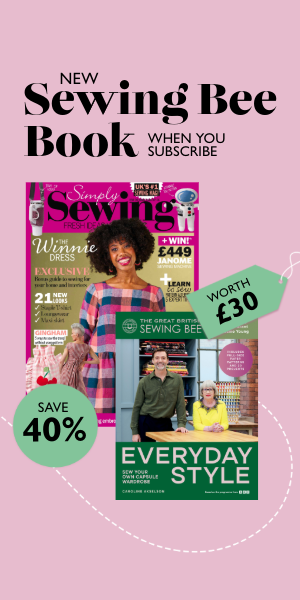
Get the new Great British Sewing Bee book worth £30 when you subscribe to Simply Sewing magazine

Ami Lowden shows you how to whip up the knitting project bag of dreams with her tutorial.

Farewell, tired totes groaning with tangled WIPs, there’s a new knitting project bag in town, and it’s made by the lovely Ami Lowden.

Tip for making your knitting project bags – pins will leave holes on the washable paper, so use fabric clips instead. Use a pressing cloth when pressing any seams, and when using metallic thread, make sure you switch to a metallic thread needle. Oh, and don’t use metallic thread in your sewing machine’s bobbin.

This project was created by Ami for Mollie Makes magazine.

DIY knitting project bags

You will need

  • One roll of washable paper in Rose Gold (Fabric 1)
  • 50cm (19¾”) duck canvas in natural, approx. 8oz weight (Fabric 2)
  • 50cm (19¾”) unbleached cotton lining fabric (Fabric 3)
  • 2m (78¾”) cotton cord, 0.5cm (¼”) thick
  • Sewing thread in cream
  • Metallic thread
  • Fabric clips
  • Tailor’s chalk
  • Jump ring, 1cm (3/8″) diameter
  • Pressing cloth
  • Safety pin

Step 1

A pair of shiny rose gold scissors rests on a white surface, next to a transparent ruler with measurement markings, set against a soft, neutral background.

Pre-wash Fabric 1 according to the manufacturer’s instructions, then cut two 23 x 40cm (9 1/8 x 15¾”) pieces and one 8mm x 5cm (3/8 x 2″)strip from it.

From Fabric 2, cut a 17 x 40cm (6¾ x 15¾”) piece, a 38 x 40cm (15 x 15¾”) piece and two 38 x 8cm (15 x 3 1/8″) pieces.

From Fabric 3 cut a 23 x 40cm (9 1/8 x 15¾”) piece and two 38 x 40cm (15 x 15¾”) pieces. Cut two 90cm (35½”) lengths of cord.


Step 2

A hand holding a piece of beige fabric with a textured surface, against a plain white background.

To make the drawstring channel, press each short end of the Fabric 2 strips to the wrong side (WS) by 1cm (3/8″) and zigzag stitch in place close to the short raw edge.

Fold one of the strips in half along the length with WS together.

Press.

Repeat this step with the second Fabric 2 strip.


Step 3

A hand gently lifts the corner of a sheet of canvas-backed paper, revealing its textured surface and a shiny, metallic underside.

Sew a 23 x 40cm (9 1/8 x 15¾”) Fabric 1 piece to the 17 x 40cm (6¾ x 15¾”) Fabric 2 piece along one long raw edge with right sides (RS) together, using a 1cm (3/8″) seam allowance.

Press the seam open, being sure to use a pressing cloth. Use fabric clips instead of pins to protect Fabric 1.


Step 4

A person's hand gently lifts the corner of a piece of fabric, revealing a shiny, metallic gold underside, with the top side being plain white.

To make a front pocket of your knitting project bag, sew the other 23 x 40cm (9 1/8 x 15¾”) Fabric 1 piece to the same-sized Fabric 3 piece along one long raw edge with RS together, using a 1cm (3/8″) seam allowance.

Turn RS out, then press so the seam sits slightly below the top on the lining side. Topstitch in place 0.5cm (¼”) down from the top pressed edge.


Step 5

A piece of shimmering fabric is laid out flat, with a metallic rose gold section clipped to a cream-colored section using small colorful clips.

To attach the front pocket to your knitting project bag, draw a vertical line down the centre of the pocket panel using tailor’s chalk.

Pin this panel directly on top of the 38 x 40cm (15 x 15¾”) Fabric 2 bag panel so the long raw edges of the pocket panel and bottom long edge of the canvas panel align.

Clip in place and sew down the chalk line through all layers using the metallic thread – this will create the pocket divider.


Step 6

A hand holding a small, rectangular piece of brown leather with a gold ring attached, set against a plain white background.

For the stitch marker loop, thread the jump ring onto the 8mm (3/8″) Fabric 1 strip and fold in half along the width, WS together and aligning the short ends.

Clip this about one third in from the left of the top edge of the knitting project bag panel with the pocket, so the raw edges align with the top raw canvas edge.


Step 7

Fabric pieces are neatly held together with colorful clips, including pink, blue, and green, on a white surface.

Clip the drawstring channel to the top edge of one bag panel centrally, aligning the long raw edges, so the gap at either end is the same. The marker loop will now be sandwiched between the canvas and the channel.

Tack this seam with an 8mm (3/8″) seam allowance. Repeat for the other side of the bag. Do not press open.


Step 8

A close-up of several overlapping fabric swatches in shades of white and cream, showcasing different textures and materials.

To attach the lining to your knitting project bag, lay one 38 x 40cm (15 x 15¾”) Fabric 3 lining panel RS together with one bag panel and pin.

This will sandwich the cord channel and the marker loop on one side, between the lining and the main bag fabric. Sew along the top canvas edge using a 1cm (3/8″) seam allowance.

Press the seam so the seam allowance is pointing towards the lining but the cord channel is facing Fabric 2. Repeat to make the second side.


Step 9

A hand holds layers of fabric, including a shiny gold piece, while a small blue clip secures the edge on a white surface.

Next, lay the knitting project bag pieces RS together, being careful to line up both the drawstring channel seam lines and the colour block seam line with the top of the pocket. Clip in place.

Sew around all four of the edges using a 1cm (3/8″) seam allowance, leaving the central 18cm (7 1/8″) of the lining’s long raw edge unstitched for turning through.


Step 10

A pair of scissors with rose gold handles is cutting through a corner of folded brown paper and beige fabric, with visible stitching along the edge, against a plain white background.

Clip off the seam allowances at the corners. Fold one of the four corners so the bottom seam allowance is sitting directly on top of the side seam, creating a triangle.

Draw a line at a right angle to the seam lines, 6cm (2 3/8″) up from the triangle corner. Sew along this line and trim away the excess, leaving a 1cm (3/8″) seam allowance, as shown.

Repeat this on all four of the bag corners.


Step 11

A hand gently pinches the edge of a piece of off-white fabric, showcasing its texture and stitching detail against a plain background.

Turn the bag RS out through the gap left in the lower edge of the lining in Step 9. Gently poke out the boxed corners. Fold the raw edges at the gap to the WS and sew 0.25cm (1/8″) in from the edge. Give the knitting project bag another press using the pressing cloth.


Step 12

A close-up of a beige drawstring bag with a decorative knot and a small charm featuring pink beads hanging from a loop. The background is softly blurred with gentle, circular light bokeh.

To add the drawstrings, attach a safety pin to one end of one of the cotton cord lengths. Pull the pin through one channel, across the gap and through the other channel.

Repeat, starting at the other end, so there are two cord ends poking out on each side of the bag.

Tie a knot in the drawstrings. Knitting project bag complete!


Keep your yarns in check with our DIY knitting project bags

This project bag is the perfect sewing project for us multi-crafters! Even if you’re not a yarn-lover, why not make this project bag as a gift for your creative pal? Alternatively, use this bag to store your sewing supplies.

Discover more handmade gift ideas

Head over to our 40 easy sewing projects you can make fast.

Quick gifts to sew

Ami Lowden

Ami Lowden

Ami is the writer behind the blog Little Tailoress, where she shares her love of sewing, knitting, vintage style and crafting a beautiful home. She sells sewing patterns and her hand-dyed yarn and knitting project bag’s online. She’s made projects for the magazine Mollie Makes too! Find her work over at http://littletailoress.co.uk/ and @tailoressstudio

See author's posts

Related

Simply Sewing subscriptions offer

Subscribe & save

Never miss an issue! Sign up to receive your favourite magazine every month – delivered straight to your door.

Sign up today

Read more

See More
News
12 things you should throw out of your wardrobe today (number 9 is a must!)

Your wardrobe Is failing you and it’s not because you lack clothes, but rather that you probably own too many. Here’s how to fix that.

Read More
Are you a Faithful or a Traitor? Get the look of TV’s most iconic woman
Simply Sewing issue 153
The “dying art” of tailoring is making a comeback, here’s why
Win a JANOME Sewing Machine!
Simply Sewing
  • Contact us
  • Terms & conditions
  • Privacy policy
  • Cookies
  • Code of conduct
  • Advertise
  • Consent Choices
© 2026 This website is owned and operated by Our Media Limited (www.ourmedia.co.uk), a company registered in England and Wales under registration number 05715415. Its registered office is at Eagle House, Colston Avenue, Bristol, England, BS1 4ST.

Type above and press Enter to search. Press Esc to cancel.

Loading Comments...