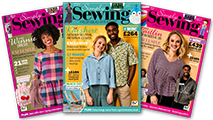



Get the new Great British Sewing Bee book worth £30 when you subscribe to Simply Sewing magazine
When they finally appeared, many people thought they were unnecessary, impractical and even scandalous

Embrace your child’s excitement for Halloween and get your sewing kit out! Make your own DIY Halloween costume with Louisa Burtonshaw’s adorable witch cape and hat tutorial.
This Halloween costume is perfect for fancy dress parties, spooky school events or as a staple in the dress-up box. You could even get your little one to help you (we dream of them growing up and becoming a star on the Sewing Bee!)
Spend the afternoon drawing out the template, cutting out and prepping the sewing and show them how you sew it all together. They’ll love helping you add the stars to the DIY witch hat!
Making a DIY witch costume (cape and hat) is a fun way to spend a couple of hours in the autumn and will get the whole family excited for the new season.
For a more personalised touch, customise Louisa Burtonshaw’s DIY witch costume in your favourite spooky colours or use some beautiful Halloween fabrics.
Ready to start some magical sewing? Let’s go!
Looking for more costume ideas? Check out these:

Sparkle tulle from White Lodge Fabrics
Top tip: Dig through your fabric stash and see whether you have the fabrics before going out to buy them.
Seam allowance is 1cm, unless otherwise stated
Download the template for your DIY witch hat and cape from Simply Sewing’s templates issue 126.
From the main fabric, cut:
From the silver lamé fabric, cut:
From the sparkle tulle fabric, cut:
From the interfacing, cut:
Take the large velvet rectangle and create a 1cm hem on the two 76cm sides and one of the 83cm edges, by folding over 1cm to the wrong side (WS) twice to encase the raw edge.
Pin and stitch using matching thread.

On the final top edge, make the ruffled collar by creating a channel.
First, fold over 1cm from the raw edge and then fold 8cm from the fold line. Pin in place.
Mark a line 4.5cm from the top fold using an erasable marking pen/pencil.
Sew along the pinned fold and along the marked line.

Head over to our complete guide to sewing which includes must-have tools, tips, tricks and plenty of sewing advice.
To create the silver lamé ruffle, fold the silver rectangle in half lengthways right sides (RS) together and pin in place.
Stitch around all three edges leaving a 10cm gap on the long edge.
Turn through the gap so that the RS is facing out.

Using the longest stitch on the sewing machine and taking care not to knot the stitches at each end, stitch along the seam line 0.5cm from the edge.
Pull the thread to create gathers in the fabric so that the silver lamé fabric is the same length as the width of the cape.

Pin the silver lamé ruffle in place along the bottom line of stitching of the channel with the body of the silver fabric covering the top collar of the cape. Stitch in place.

Fold the larger tulle rectangle lengthways so that the top half is 25cm and the bottom is 30cm.
Using the longest stitch length, gather on the sewing machine in the same way as the silver lamé, stitching 0.5cm in along the fold along the length of the rectangle.

Gather the tulle to the same length as the width of the cape and pin the tulle touching the folded edge with the folded edge of the silver lamé.
Pin and stitch in place.
Fold the silver lamé back down over the tulle to cover the messy edges.

Place ten of the stars on the exposed section of the velvet cape. Arranging them in a random pattern.
Place two stars at each top corner on the collar section.
Iron/fix in place as per to the manufacturer’s instructions.

Attach a safety pin to one end of the ribbon and feed it through the channel in the collar.
Pull the ribbon, ruching the collar and fit to the child, making sure it fits around the neck and meets up at the front centre. Pin in place.
Stitch through the velvet and ribbon at both openings to secure.

Take the piece of hook and loop tape and separate it into two pieces.
Attach one piece to the ribbon on one side of the opening, close to the velvet cape.
Attach the other piece to the ribbon on the other side. Trim both ribbons to 11cm long.
Take a silver lamé star and an iron-on silver star and sandwiching the end of the ribbon between them, secure together by either ironing or gluing. Repeat this for both ends of ribbon.
Your witch cape is complete! Ready for your little one to swish around in and cast spells.


Take the velvet Hat Cone and bring the two straight edges together RS together.
Pin in place and stitch.
Turn it through so that RS are facing outwards.
Iron the interfacing Hat Brim piece to the WS of the silver lamé Hat Brim piece.
With RS together, pin the velvet Hat Brim to the silver lamé Hat Brim and stitch around the outer circumference.
Turn so that RS are facing outwards and press.

Pin the inner raw edges of the hat brim to the hat cone with RS of the velvet fabric together.
Stitch in place.
Finish the raw edges of the seams either with an overlocker or with bias binding tape.

With the hem facing upwards into the cone of the hat, topstitch 3mm up from the seam on the cone piece of the hat. This ensures the seam will sit upwards away from the face.
Take the smaller tulle rectangle and fold in half lengthways.
Using the longest stitch length on the sewing machine and taking care not to knot each end, stitch 5mm in from fold.
Gather the tulle by pulling on one of the threads at one end.

Lay the tulle out and make sure it is the right length to go around the cone of the hat.
Pin in place 1cm above the seam line. Pin and stitch in place.
Take three iron on stars and place them onto the cone of the hat. Iron/fix in place.
Your DIY witch hat is now ready for your little witch or wizard. Size up the pattern to sew an adult-sized version!

This magical costume is not only a fun project, but the machine-stitched design means it’ll last for years of dress up. Your kids will love wearing their DIY witch hat and running around in their witch cape.
Plus if this witch costume gets particularly sticky with Halloween treats, you can always just pop it in the wash!
Whether old or young, everyone enjoys a treat now and then! Spoil your family or friends with the latest trend Halloween Boo Baskets.


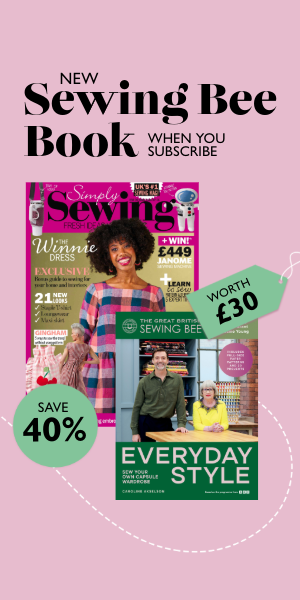
Never miss an issue! Sign up to receive your favourite magazine every month – delivered straight to your door.
Sign up today